Blog


Mask Instructions

Crafting, pandemic edition.

I’ve been making masks over the past few months, and wanted to put my method up with a few pictures in case it’s helpful for anyone. Here’s what they look like finished. They loop around the ears like medical masks, and have a removable nose wire.   Thanks to everyone who sent me pictures!  From them, I can tell that my face is smaller than average, so I’m making the masks bigger now 🙂


1 – Cut 9×7.5″ square of two fabrics, one for the front, one for the back. I use 100% cotton quilting fabric for the front, and prefer a t-shirt material/jersey/flannel for the back, since it’s softer against my face. Put them right sides together.

2 – In the seam allowance on the back of the stiffer layer, mark where you want to attach the elastic. I go up a bit from the bottom, and down from the top far enough that it will be just below the fold for the wire pocket.

3 – cut elastic to desired lengths. This will depend on which elastic you’re using, but 7″ per side works for a medium-size mask with what I’ve been using (loose on me but still functional, the right size for most folks I’ve talked to).

4 – Sew around the edges, leaving a gap at the bottom for turning, and insert the elastics as you go, with the loop on the inside. I leave a presser-foot-width seam allowance. If using jersey, I find it much easier to sew with the cotton side on top, since the jersey stretches a bit.

I use long needlenose pliers to make it easier to position the elastic where I want it. The elastic is shorter than the distance between the attachment points, so I found it easier to position as I go rather than trying to pin ahead of time.  If using round elastic, sew over it a few times to ensure it’s secure.


5 – Clip the corners, then flip right-side-out.  Push out the corners so they’re crisp.

6 – Iron the seams (be careful of the elastic if it isn’t heat resistant – I’ve melted several!). Fold the top seam over about 1/4-1/3″ onto the back and iron well. Then sew it down as close to the bottom edge as possible to leave a pocket to slide the nose wire into.

7 – Iron 3 pleats into the mask. I iron in half, then the top in quarters. I iron the bottom at slightly less than a quarter. Then use these as guidelines for pinning. With the pleats, I aim for 3-4″ height.


8 – Top stitch around the remaining 3 sides, making sure to leave the ends of the top pocket open, and making sure the gap in the bottom seam is fully closed.

9 – Wash (I use cool water with unscented detergent, then dry in the dryer on medium heat). Then I re-iron the pleats because I don’t like wrinkles.


Music Storage – Part 1

After many years of inadequate storage/organization, I’m embarking (slowly) on a voyage to organize my music.

Goals for storage:

  • Easy to find by instrumentation
  • Fits in my Ikea Kallax shelves
  • Portable for rehearsals away from home
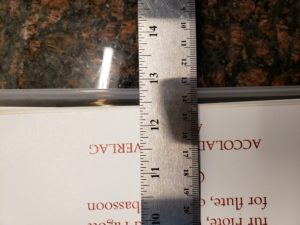
  • Fits paper that’s 10×13 if possible, but 9×12 a must

I have found an inexpensive, temporary solution. Here are the pros and cons. Any suggestions welcome!

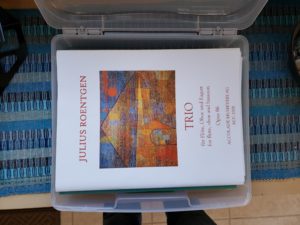
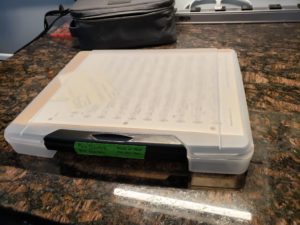
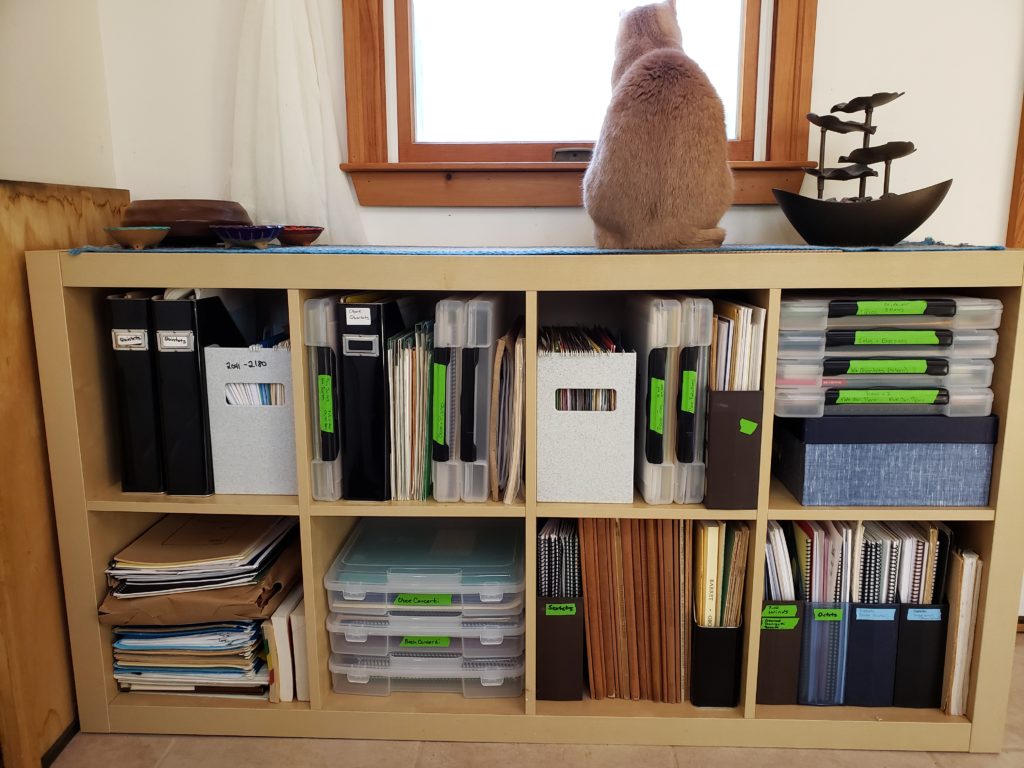
I currently have two brands of plastic, latching cases. I bought both at Michael’s (best price), but links to Amazon below.

1)  Iris Portable Project Cases (link)

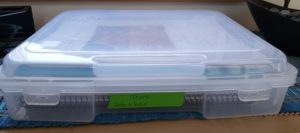
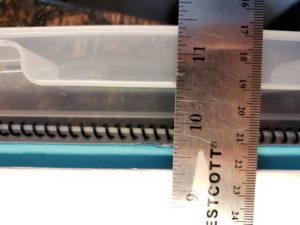
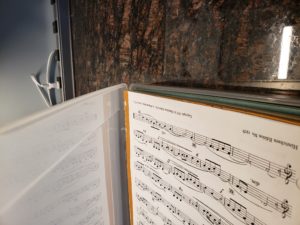
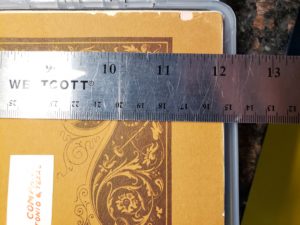
Interior dimensions 12 1/2 x 10 1/8 x 2 1/4 (inches).  But it’s actually 3″ thick all told; there’s a lot of dead space in the lid that’s only useful if you’re willing to stack above the base height and close the lid carefully. Then you get 2.5″ of thickness (lid bumps in, so maybe 2.75″ if it’s letter sized and you’re not in a hurry).


The latches on these are ok. They’re just the plastic bending hinges, so I don’t know how they’ll hold up long term, but I got 6 and the plastic wasn’t warped on any of them, and the seal with a satisfying click.  They’re plenty large for nearly all my music. They stack nicely, and lock reasonably securely into the box below. The just barely fit in my bookcase, so that’s perfect; no dead space.  They are thicker than I need for most categories of music though, so while I have plenty o f 2-oboe and bassoon trios to fill a whole box, they’re not very efficient for other categories.  I know I can combine 2 or 3 categories in one box, but that defeats the ‘portability’ qualifier, since it means I drag a lot of extra weight around with me.


2) Iris Slim Portable Project Cases (link)

I wanted to love these. I wanted them to be a thinner version of the above case, so they’d stack neatly, but be more efficient for arrangements I have fewer pieces of. They failed on so many counts, they went back immediately.

  • Different dimensions than their thicker counterparts
  • Don’t stack with the larger size
  • Latches are super cheap, and half of them didn’t even engage when brand new
  • Plastic was thinner, and deformed more readily


3) Iris Slim Portable Project Cases with Buckle (link)

My feeling about these cases is incredibly mixed, but I got a good deal and have no better solution, so this is what most of my music is in at the moment.

Interior dimensions: 9.25″ x 12.25″ x 1.5″  They’re not much more than 1.75″ tall, so much more reasonable for most of the volumes of music I need to store. They don’t fit 10×13 music… this is only the problem for the occasional piece or two, and those go in the larger cases.  I really like the buckle; they’ve stayed closed so far when being thrown into gig bags, randomly in the back of the car, etc. The big problem with these is that the plastic is too thin, and the sides bow. They have a great channel to securely close, but the channel doesn’t always line up because of the distorted sides. They also don’t lock into each other when they stack. So when you pull out one, the whole stack falls over.

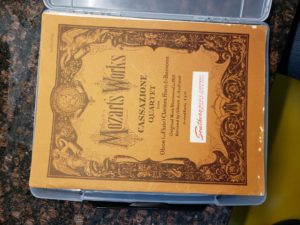
I also used some of my spare scrapbook paper boxes to hold the other stuff, including some ones meant for 12×12 paper to hold orchestral parts (not shown).  I really preferred my old method of using letter-size hanging files inside the plastic holders and magazine files, but too much of my music is 9×12 for this to work anymore. And the legal size ones still don’t help, since 10×13 paper is too wide for them.  I’m happy with a mixed solution, if anyone has other suggestions!

Or maybe we should develop a line of office supplies targeted toward 10×13 paper…  How is this not a thing?


Mozart K406 Double Reed Quintet – Performance

I’m really a huge fan of some of Mozart’s chamber works. In particular, I’ve always enjoyed his Serenade for Winds in C minor (K388), but it’s hard to get a group of 8 together to play chamber music on a regular basis. So you can imagine my excitement to learn that Mozart himself arranged the Serenade for a viola-quintet (K406), which translates really well back into a wind piece – for two oboes, two English horns, and bassoon! We played two movements from this past January in the Brockton Symphony chamber concert. What fun!

Melanie Hayn & Tegan Sutherland – Oboe

Mark Finklestein & Ashley Perry – English Horn

Bob Gemmell – Bassoon


Tweaks to Windows 8: Part 1

There are several things in Windows 8 that are clearly not meant for people using this OS for business or science. So this is a list (updated as necessary) of the tweaks I’ve found necessary to be as productive in 8 as I was in 7.

First, if you right-click the start screen icon on the taskbar, you can get to some of the things that used to be in the start menu: control panel, shut down, etc.

1)Search

1a)The default search only finds files if they’re in libraries, which I don’t use. So select Indexing Options in the Control Panel, click the Modify button and add additional drives and folders that you want to be searchable.
1b) I also don’t want to search the web from the search pane, just my computer! Disable the online component via the Settings charm > Change PC settings > Search.
1c) Want to search from the desktop rather than going to the start screen? Keyboard shortcut [Windows) + S opens a search bar.

2) Booting. I almost never use the tablet-friendly app versions of programs… it’s a laptop and I want my desktop! So:
2a) right-click on the desktop taskbar, choose Properties and then open up the Navigation tab — tick the top option under the Start screen heading to “boot to the desktop”.

3) Touch-screen vs. trackpad. I’m excited to figure out how the touchscreen can enhance my efficiency, however some features are just plain ridiculous if you have a keyboard/trackpad. So here are some tweaks:

3a) Turn off hot corners. Right-click the desktop taskbar, choose Properties and then open the Navigation tab. Under the Corner navigation heading, you can disable the top left (open apps) and top right (Windows charms) corners.
3b) Turn off the feature where mousing from the right opens the charms bar. On lots of systems, this will be in control panel under your mouse options. However, my Asus has some crazy third-party software that I haven’t figured out yet.

4) Backing up. After all this effort, I definitely want to make a system image so it’s easy to restore if my HD fails. Launch the desktop Control Panel, then choose System and Security > File History window and the System Image Backup option is down in the lower left-hand corner.

5) Keyboard shortcuts. I absolutely hate having to hover in a corner to open the side charms bar. Nothing as annoying as a) having to pause, and b) having it open by accident when you’re working in a program and mouse over there. So
5a) Disable hot zone for charms
5b) Settings Charm: [win] + [ i ]
Charm Bar: [win] + [ c ]
Desktop: [win] + [ d ]

[win] + [down arrow] closes an App

6) Fuzzy programs
Several programs aren’t optimized for high-resolution computer monitors yet, like Google Chrome, Office 2010, ArcGIS, etc.  To remove the fuzziness, right click on the icon to open the program, and go to properties.  Under “compatibility” check the box for “disable display scaling on high dpi settings”. Hopefully new versions of these programs won’t have the same problems.

For full info, here are some of the sites I got this info from:
http://reviews.cnet.co.uk/laptops/20-tips-for-windows-8-1-50012852/
http://www.howtogeek.com/167013/how-to-optimize-windows-8.1-for-a-desktop-pc/
http://www.howtogeek.com/175664/how-to-make-the-windows-desktop-work-well-on-high-dpi-displays-and-fix-blurry-fonts/


Citation language sorting problem: solved!

I’ve been having a lot of difficulty with the various citation management software packages based on the CSL language, as none has a built-in style that aligns with how we’ve always formatted our citations, particularly the sort order.

From my understanding, what we want for citations by the same first author:
– single author pubs in chronological order (oldest first)
– multi-author pubs in chronological order (oldest first)

This morning I finally did the research to come up with a solution that appears to work!

This should sort all papers by their first author. Then within that, it sorts between single-author and multi-author papers. Within each of those categories it searches by year

Method 1: via a direct CSL code editor

In the macro section, add the following macro:

<macro name=”Author-count”>

<names variable=”author”>

<name form=”count” et-al-min=”3″ et-al-use-first=”2″/>

</names>

</macro>

Then, in the <bibliography> section, specify your sort as:

<sort>

<key macro=”author-short” names-min=”2″ names-use-first=”1″/>

<key macro=”Author-count”/>

<key macro=”year”/>

</sort>

Method 2: via csl.mendeley.com/visualEditor/

1) add a new macro

– named author-count

– add an element for names

– add an element to names for variable ‘name’

– under “form” select “count”

– under “et-al-min” select “3”

– under “et-al-use-first” select “2”

2) under sort, first use a macro for “author-short”

– specify “names-min” as “2”

– specify “et-al-use-first as “1”

3) under sort, then add a macro for “author-count”

– leave all options blank (default)

4) under sort, add a 3rd macro for “year”

– leave all options blank (default)


Setup tips for Windows 7

If you’re like me, you often don’t agree with what Microsoft thinks are useful features. Here’s a short compilation of the steps I take when dealing with a fresh Windows 7 install, which I’ll update as I apply them to my newest install.

1) Turn off automatic docking

DockingI find nothing more annoying than my computer assuming I want one thing while I try to do another.  It’s easy to turn off, but hard to find.

Go to the Ease of Access Center, make the mouse easier to use, and check the box to prevent docking.

2) Make explorer window only show useful shortcuts on the left.

I only use the “Favorites” and “Computer” groups, so I hide the others (network and libraries).

It requires registry entry changes (right click first to give yourself permission to edit):

Libraries
HKEY_CLASSES_ROOT\CLSID\{031E4825-7B94-4dc3-B131-E946B44C8DD5}\ShellFolder
change b080010d to b090010d

Network
HKEY_CLASSES_ROOT\CLSID\{F02C1A0D-BE21-4350-88B0-7367FC96EF3C}\ShellFolder
change b0040064 to b0940064

Full link to LifeHacker post.


ESRI continuous world aerial photography

While helping a student the other day, I stumbled across a background ESRI now offers in ArcGIS 10 with continuous world imagery.  Similar to Google Earth, it streams the orthophoto tile to your system and selects the most appropriate photo and resolution based on your view extent. While it does require internet connectivity to work, using this layer can save the time of downloading potentially hundreds of aerials for large study areas.

It is not as sophisticated as Google Earth (you get one image of ESRI’s choosing, no scrolling through history), but for simple tasks it’s great.

A word of advice when using. Turn the layer off until everything else on your map is set up, then enable the background layer. It’ll make your processes run much faster, since the map won’t need to download and re-render every time you change your view.

http://www.arcgis.com/home/item.html?id=10df2279f9684e4a9f6a7f08febac2a9

Some tips on projection.  These background files are in the web mercator projection (see link below), which is not compatible with the UK datum. Remember to set a transformation in your map document properties to correct this, or you’ll be ~half a kilometer off.


Binding Machine!

I guess I should also post the reason I was away for so long. I finally finished editing my thesis, and now am a master of science!  (Where’s my cape?)

From a crafty perspective, it gave me an excuse to buy more coils for my binding machine; I felt like a kid in a candy store, picking out the colors 😀

So now that I had bindings (and quality paper for the covers plus clear oversheets), I could make a multitude of budget copies (since the hard bound ones were pricey!).


And now I have lots of colors, to color code the music booklets that eventually I will get motivated to assemble.


Computer tip – minus signs in text

I know this is barely a craft, but I had to record it somewhere before I forget (since editing the ‘tips’ section of my website is too difficult… must remedy this in the future).

I was getting incredibly sick of Word putting the line break in the middle of my exponents. For example:

… rates of 3.0 kmol N d−
1 and other…

So I learned about the “non-breaking” dash/minus sign, unicode character 2212.  To insert it, type 2212, then press alt+x to replace the 2212 with the symbol.  I then ctrl-h’ed to replace all of them.


Injera – Day 2.5 – cooking

This morning, our injera had a distinct grey watery layer on top and a very distinct smell. We tried to follow the instructions and pour the water off the top, but the dough was a bit too watery for that, so we left it alone.  We followed the instructions; took 1c and added it to 2c boiling water and stirred until it thickened, then added back to the main bowl and left covered in a patch of sun to rise.

In the meantime, we started on the entrees. First, about 11 cups of onions browned, then I pre-measured out all the spices for the five dishes into individual bowls to facilitate massive cooking efforts later.

By this time, the injera was ready to cook. It took a few tries to get the heat just right (water droplets skittering across the pan surface). After a few failed attempts, we had it down well enough; the key was pouring on the batter and getting it even very quickly, leaving it for a few seconds, then clamping the lid down to steam the top. When they cooked properly, they slid around on the pan without sticking and were very easy to remove.

They usually looked great in the pan, even when the end result was a dud

Very first attempt resulted in a crumbly mess that stuck to everything

By the end, we were getting very nice results

It’s a good thing we have the 5-burner stove… this is the first time we’ve needed to have that many things going at once.

Eli was great at stirring things left-handed while I ran about doing the tasks that required two hands

Overall, everything came our really well. The collard greens were the biggest hit, none left over from that. I’ve learned that the recipes call for more berbere than I’d like; most of the dishes were too spicy for me (but perfect for Eli).  Also, despite cooking the lentils a lot longer than the recipe called for, they were still quite crunchy. I guess we’ll boil them longer next time. I wish I hadn’t been too busy at the end of the meal to send folks home with leftovers! There’s no way Eli and I will finish all of this in the next few days.

The final spread